Creating a tech pack for clothing is a crucial step in the fashion design process, especially if you want to bring your designs to life with accuracy and consistency. A fashion tech pack is like a blueprint for your clothes. You cannot do sampling processes without tech packs.
It helps everyone involved in making them, like designers and manufacturers, understand exactly how your design should be. In the previous article, you can find some apparel tech pack sample.
If you’re new to the world of fashion design, don’t worry! This step-by-step guide will walk you through the process of creating a tech pack that is both comprehensive and beginner-friendly.
What is a Tech Pack in Fashion?
Before diving into the process, let’s clarify what a tech pack is.
A fashion tech pack (short for technical package) is a document that outlines all the details necessary to manufacture a product.
It includes everything from garment measurements and fabric types to stitching techniques and color specifications. Essentially, it’s the roadmap that guides your design from concept to reality.
Why is a Tech Pack Important?
A well-made tech pack is essential for several reasons:
- Clear Communication: It bridges the gap between designers and manufacturers, ensuring everyone is on the same page.
- Cost Efficiency: By specifying every detail, you minimize errors, reduce the need for revisions, and save time and money.
- Consistency: A tech pack ensures that your design is produced consistently and quality control is properly made, whether you’re making one piece or a thousand.

Step-by-Step Guide to Creating a Tech Pack
Now that you understand the importance of a tech pack, let’s get into the step-by-step process of creating one.
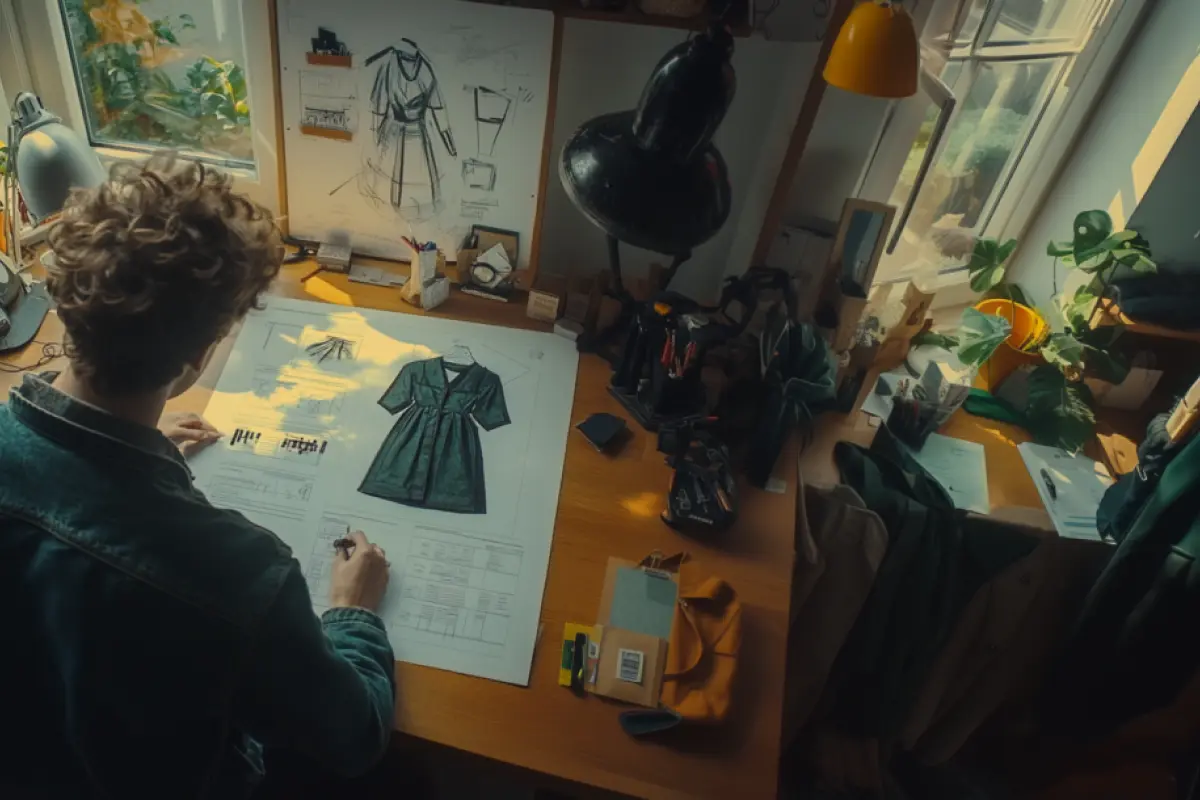
Step 1: Sketch Your Design
The first step in creating a tech pack is to sketch your design. This can be a hand-drawn illustration, technical drawings or a digital sketch created using design software like Adobe Illustrator or CorelDRAW.
- Front and Back Views: Include both front and back views of the garment to give a complete visual representation.
- Detail Views: If your design includes intricate details (like embroidery, buttons, or zippers), create close-up views of these areas.
Your sketches don’t need to be works of art, but they should clearly convey the design’s key elements.
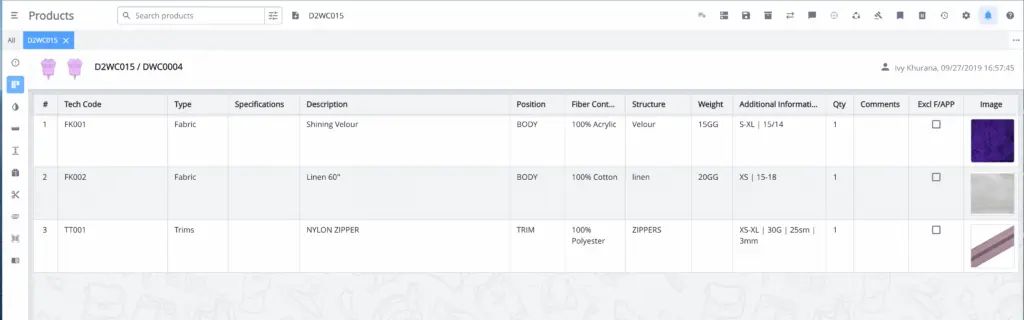
Step 2: Create a Bill of Materials (BOM)
The Bill of Materials (BOM) is a comprehensive list of all the materials required to make the garment. This includes fabrics, threads, buttons, zippers, labels, and any other trims. Some fashion brands have a separate garment tech pack format for collection or line.
- Fabric Details: Include information about the fabric type, composition, color, and supplier details.
- Trims and Notions: Specify the type, size, color, and quantity of trims like buttons, zippers, and labels.
The BOM should be as detailed as possible to avoid any confusion during the manufacturing process.
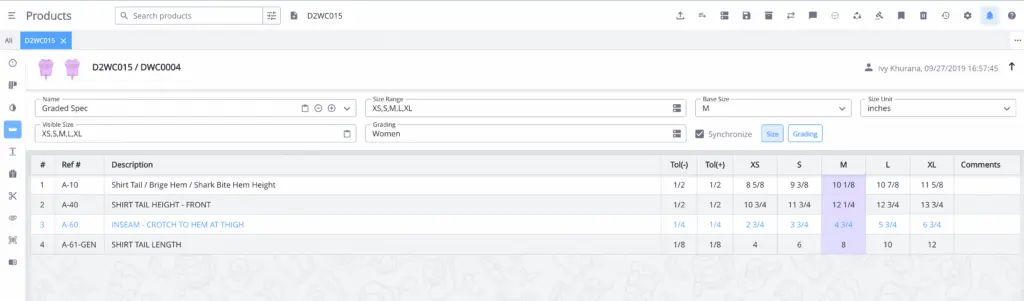
Step 3: Specify Measurements and Grading
Accurate measurements are crucial in ensuring that the garment fits as intended. In this step, you’ll need to create a measurement chart that outlines the key dimensions of the garment for each size.
- Point of Measurement (POM): List the specific points of measurement (e.g., chest width, sleeve length) and provide the corresponding measurements for each size.
- Grading: Include the grading rules, which indicate how the measurements should change between sizes. For example, you might add 1 inch to the chest width for each size increase.
This step ensures that the garment will be produced in the correct sizes and proportions.
Step 4: Include Construction Details
Construction details are instructions on how the garment should be assembled. These details guide the manufacturer on stitching techniques, seam types, and other construction elements.
- Stitching: Specify the type of stitches to be used (e.g., single needle, overlock) and their density.
- Seam Types: Indicate the types of seams (e.g., French seam, flat-felled seam) to be used on different parts of the garment.
- Label Placement: Provide clear instructions on where labels (such as size tags or care labels) should be placed.
Including these details helps ensure the quality and durability of the final product.
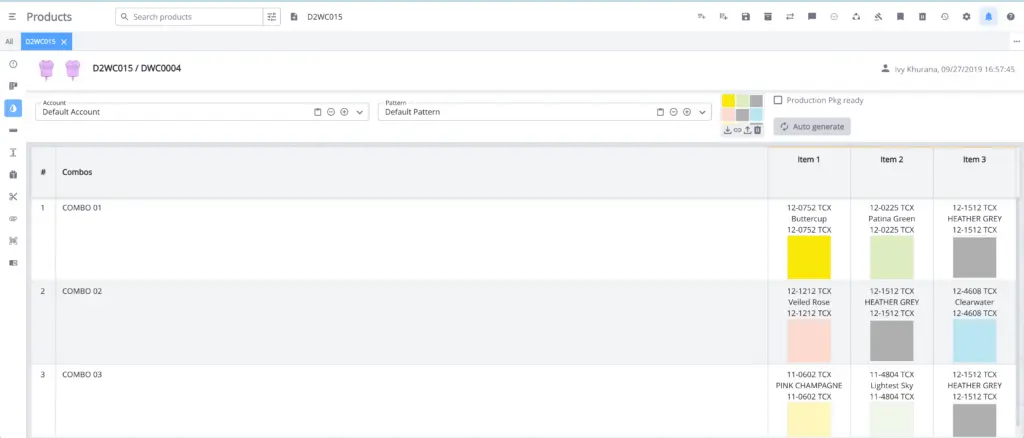
Step 5: Add Colorways and Pantone References
Colorways refer to the different color options available for your garment. For each colorway, you’ll need to provide Pantone references, which are standardized color codes used across the fashion industry.
- Pantone Codes: Include the exact Pantone color codes for each colorway. This ensures that the manufacturer uses the correct colors.
- Color Placement: Specify where each color should be applied on the garment (e.g., main body, sleeves, trims).
Accurate color information is essential for maintaining the design’s integrity.
Step 6: Create a Technical Sketch (Flat Sketch)
A technical sketch, also known as a flat sketch, is a 2D representation of your garment. Unlike your initial design sketch, the technical sketch is more precise and includes annotations that indicate specific design details.
- Proportions and Scale: Ensure that the sketch is proportionate and accurately represents the garment’s shape and construction.
- Annotations: Add labels and arrows to indicate details like pocket placement, buttonholes, and stitching lines.
The technical sketch is a crucial component of the tech pack as it provides the manufacturer with a clear and detailed visual reference.
Step 7: Compile the Tech Pack
Once you’ve created all the necessary components, it’s time to compile them into a single document. Most designers use software like Adobe Illustrator, Excel, or dedicated tech pack software to organize and format their tech pack.
- Organize Sections: Divide the tech pack into clear sections (e.g., design sketches, BOM, measurements, construction details) for easy navigation.
- Double-Check Details: Review each section carefully to ensure all information is accurate and complete.
- Save and Share: Save the tech pack in a shareable format (e.g., PDF) and distribute it to your manufacturer.
A clear tech pack lowers production errors and helps your manufacturer understand your instructions better.
Beginner-Friendly Tips for Tech Pack Creation
Creating a tech pack for the first time can be daunting, but here are some tips to help you get started:
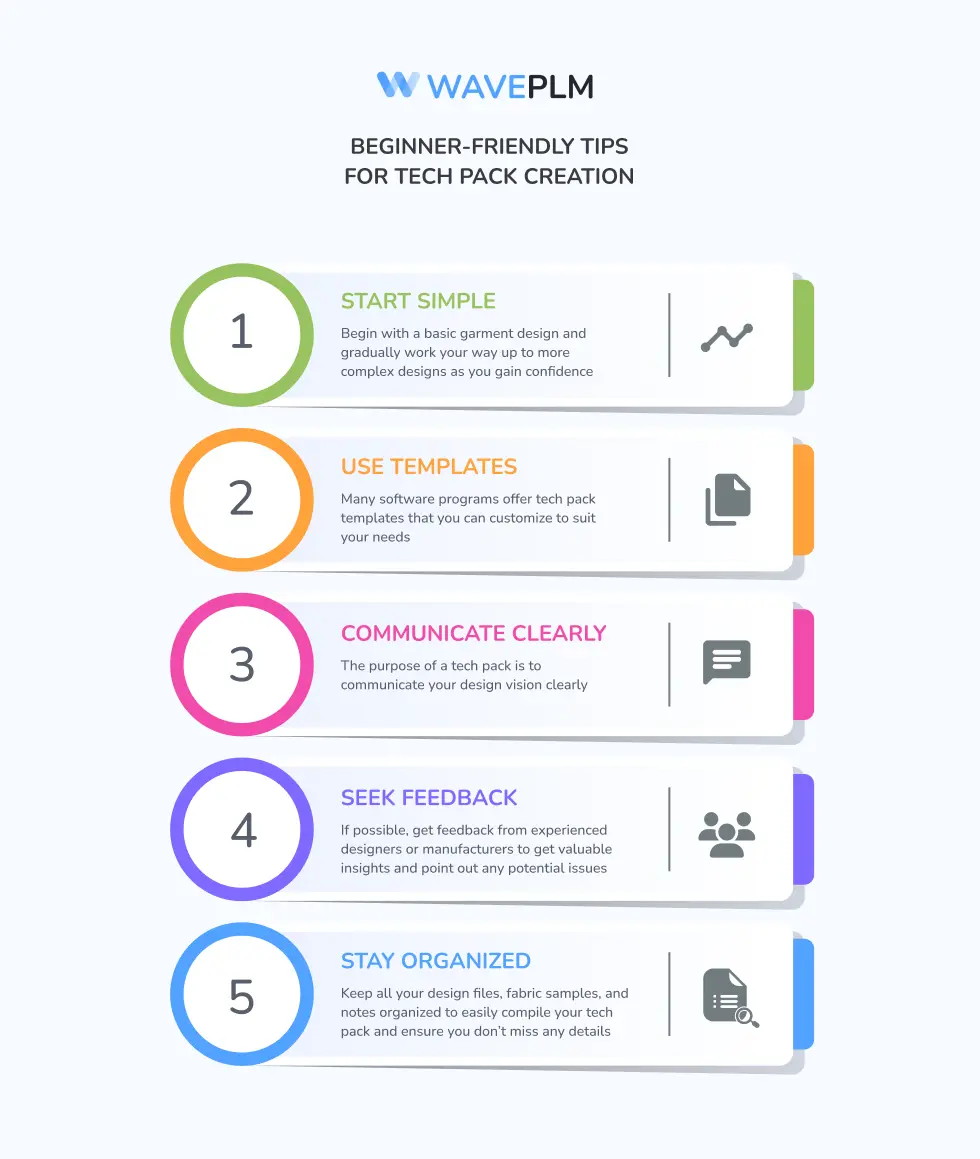
- Start Simple: Begin with a basic garment design and gradually work your way up to more complex designs as you gain confidence.
- Use Templates: Many software programs offer tech pack templates that you can customize to suit your needs. This can save you time and ensure consistency.
- Communicate Clearly: The purpose of a tech pack is to communicate your design vision clearly. Avoid jargon or ambiguous terms that could confuse the manufacturer.
- Seek Feedback: If possible, get feedback from experienced designers or manufacturers. They can provide valuable insights and point out any potential issues.
- Stay Organized: Keep all your design files, fabric samples, and notes organized. This will make it easier to compile your tech pack and ensure you don’t miss any details.
Conclusion
Creating a tech pack is a vital skill for anyone involved in fashion design. While it may seem overwhelming at first, breaking the process down into manageable steps and paying attention to detail can make it much more approachable.
Follow this guide to create a detailed tech pack for your designs. It will help bring your ideas to life accurately and consistently. Remember, practising makes perfect, so don’t be discouraged if your first few attempts aren’t flawless. With time and experience, you’ll become more confident in creating detailed and effective tech packs.
For those looking to streamline the process even further, consider using Wave PLM. This powerful product lifecycle management (PLM) software allows you to generate tech packs with just one click, significantly simplifying the process.
Wave PLM offers customizable tech packs tailored for different purposes, ensuring that each document meets the specific needs of your project. Additionally, Wave PLM integrates seamlessly with Adobe Illustrator, making it easy to import and edit your designs directly within the platform.
This apparel management software also features an extensive library of garments and components, which you can use to quickly build and modify your tech packs. Whether you’re a beginner or an experienced designer, our PLM software can make your tech pack creation process faster, easier, and more efficient, allowing you to focus more on creativity and less on administrative tasks.


Leave a Reply